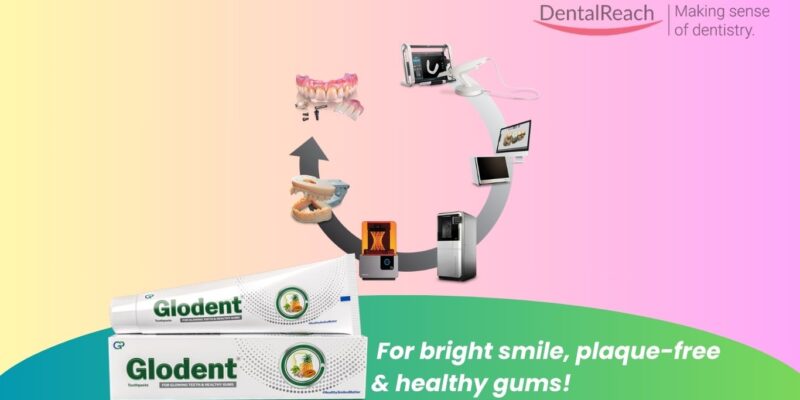
Modern dentistry integrates digital scanning, planning, and CAD/CAM fabrication to streamline treatments across specialties. A typical digital workflow spans three main phases: data acquisition (intraoral scans, CBCT, photos), software-based treatment planning/design, and manufacturing (milling or 3D printing) of restorations or guides. Each specialty applies this framework differently:
1. Implantology
In implant dentistry, treatment begins with precise imaging of the patient’s jaws. A CBCT scan (DICOM data) captures bone anatomy and critical landmarks (nerves, sinuses), while an intraoral scan (STL data) records the soft-tissue and dentition surfaces. These datasets are imported into implant-planning software (e.g. 3Shape Implant Studio, coDiagnostiX, DTX Studio) and aligned to create a 3D virtual patient. Key steps include:
- Prosthetic-driven planning: Design a provisional crown or set the ideal tooth position in CAD first, then plan the implant in that context. This ensures implant angulation and depth support the final prosthesis.
- Guide design: Use software to design a patient-specific surgical guide that fits over teeth or mucosa. The guide is exported as an STL and fabricated (typically via biocompatible 3D printing).
- Guided surgery: During implant placement, the printed guide directs the drill and implant to the planned position, greatly improving accuracy. Clinicians report that “guided implant surgery…helps improve surgical outcomes…as well as improve the experience for our patients”.
- Restoration design: After implants heal, scan or import the implant position into CAD software to design custom abutments and crowns. These may be milled or printed (zirconia, titanium, hybrid abutments, etc.) and delivered as final prostheses.
Common tools:
- CBCT units (Planmeca ProMax, Carestream CS 9600, iCAT),
- intraoral scanners (3Shape TRIOS, iTero, Medit),
- implant planning software (coDiagnostiX, Blue Sky Plan, 3Shape Implant Studio, DTX Studio),
- surgical guide printers (Formlabs, NextDent, Carbon; sometimes milling units).
- Lab-side CAD (exocad, 3Shape Dental System) and
- milling machines (Roland, vhf) are used for custom crowns.
Benefits: Digital implant workflows increase precision (avoiding vital structures), save chair time, and enhance patient communication (3D visualizations). Dr. Zach Evans notes that unifying CBCT, scans, and CAD/CAM under one system “helps us achieve our clinical goals better than with other systems”. By planning restorations beforehand, surgeons have fewer surprises.
Challenges/Best Practices: Accurate scanning is critical – poor intraoral or CBCT data can ruin a guide fit. Practitioners should calibrate scanners, use proper scan protocols (dry field, stable patient in CBCT), and verify data alignment. Another challenge is interoperability: using open STL formats facilitates collaboration with external labs, whereas closed systems (in-office CEREC) require in-house restoration fabrication. Proper training in guide software and reserve lab backup can mitigate integration hurdles.
Workflow summary (guiding focus):
- Scan: Acquire CBCT + intraoral scan.
- Plan: Merge data in planning software and design prosthetic-driven implant positions.
- Design: Design surgical guide and manufacture via 3D printing.
- Execute: Place implant with guide; then scan implant position and CAD-design the final crown/abutment.
- Deliver: Mill or print the final restoration and seat it, completing the workflow.
2. Orthodontics
Orthodontic digital workflows start with intraoral scanning of both arches (and often facial or cephalometric imaging for complex cases). Digital models are used for diagnosis, treatment planning, and appliance design. Key steps include:
- Digital diagnosis: Software like Dolphin, OnyxCeph, or 3Shape Ortho Studio can manipulate scanned models and CBCT images for detailed analysis. Treatment simulations (for braces or aligners) are created and reviewed.
- Setup and appliance design: For clear aligners, clinicians submit intraoral scans to aligner labs/software (e.g. Invisalign/ClinCheck, SureSmile, or other clear-aligner CAD platforms). The software generates a staged tooth-movement plan. For traditional braces, CAD can be used to design indirect bonding trays: brackets are positioned virtually on the digital model and a transfer tray is 3D-printed.
- Manufacturing: Aligners are made by 3D-printing the setup models and thermoforming plastic over them. Dentists receive aligner series plus an attachment/IRP placement guide. Bracket trays are printed in biocompatible resin and used chairside for efficient bonding. Retainers and other appliances are also designed in CAD and produced by 3D printing or thermoforming.
Common tools:
- Intraoral scanners (CEREC Primescan, 3Shape TRIOS, iTero),
- orthodontic software (Invisalign/ClinCheck, SureSmile, Maestro3D, Orchestrate3D),
- 3D printers (Formlabs, EnvisionTEC) and
- Vacuum formers.
- Apps and cloud platforms (e.g. Dentsply’s DS Core) facilitate communication with labs.
Benefits: Digital orthodontics “enhances appliances precision” and treatment predictability. Patients avoid messy impressions, and doctors can show virtual treatment outcomes (overlays of pre- and post-treatment occlusion) to improve case acceptance. The lab can quickly fabricate appliances with high accuracy, and plans can be easily adjusted mid-course. Notably, orthodontists reduce the number of visits for retainers and aligner follow-ups (since models and instructions are stored digitally).
Challenges/Best Practices: Costs and technical learning can hinder adoption. Clinicians must understand aligner biomechanics (e.g. when to use attachments). Proper scanner calibration and patient cooperation (for full-arch scans) are important. Aligners and trays should be checked for fit; prints must be cleaned and post-cured correctly. For traditional braces, ensure digital brackets/trays match actual bracket systems.
Workflow summary:
- Scan: Acquire intraoral scans (and diagnostic CBCT if needed).
- Plan: In orthodontic CAD software, perform setup (tooth alignment, occlusion) and design appliances. For aligners, submit case to aligner software.
- Design: Generate digital models for each aligner/tray stage or bracket-transfer tray.
- Manufacture: Print models or trays. Thermoform aligners on printed models or fabricate retainers on resin-printed arches.
- Deliver: Place aligners or bond brackets using printed guides. Attachments are bonded per digital plan, and occlusion progress is monitored digitally.
3. General Restorative Dentistry
For crowns, bridges and inlays/onlays, the digital workflow replaces traditional impressions and stone models. Dentists begin with an intraoral scan of the prepared teeth. The scan data (STL) is sent to CAD software (such as exocad, 3Shape Dental System or CEREC) to design the restoration. Typical steps:
- Digital impression: After tooth preparation, capture the scan (often including bite registration). Scanning is much quicker and more comfortable than analog impressions. There is no mixing, no tray, and no disinfecting a bulky impression.
- CAD design: Using the digital model, the restoration (crown, veneer, onlay, etc.) is designed in real-time. Occlusal contacts and margins can be adjusted on-screen. This “model-less workflow” lets the clinician preview fit and occlusion before manufacturing.
- CAM fabrication: The approved design is sent to a milling machine (e.g. Roland DWX, Planmeca PlanMill, Dentsply Sirona MC series) or a 3D printer. Zirconia or e.max ceramic blocks are milled for final restorations, while resin printers may be used for provisional parts. Many labs also print high-precision models for lab-fabricated restorations.
- Delivery: The milled crown or bridge is tried in and cemented/bonded. Because contacts and occlusion were virtually adjusted, fit is usually excellent, minimizing adjustment time.
Common tools:
- Intraoral scanners (3Shape TRIOS, iTero, Carestream CS 3700, Medit i700, CEREC) produce digital impressions.
- CAD software (exocad, 3Shape Dental System, Ceramill Mind, Dentsply inLab) allows detailed design.
- Milling units (Roland DWX, vhf, Planmeca, 3Shape D-series) cut ceramics or composites.
- Printers like Formlabs or Asiga often make resin models or temporary crowns.
Benefits: The digital approach is more efficient and patient-friendly. Scanning and CAD/CAM can often condense a 2–3 visit crown case into a single visit. Restorations fit well because the scan captures margins precisely and the software checks contact points digitally. Records are stored digitally, facilitating communication with dental labs via cloud platforms.
Challenges/Best Practices: Scanning subgingival margins can be tricky – use gingival retraction or scanning powder if needed. Not all scanners capture full arches equally; choose a scanner with proven accuracy. Ensure the digital lab/cad system is compatible with your scanner or use open STL. Hands-on skill in the CAD software is required to get optimal designs (especially for esthetic cases). Careful calibration of milling machines and knowledge of material shrinkage are needed.
Workflow summary:
- Scan: Intraoral scan of prepared tooth/teeth (no physical impression).
- Design: In CAD, design the restoration, check contacts/occlusion virtually.
- Manufacture: Mill or print the restoration (in-office or lab).
- Finish: Adjust as needed, glaze/polish, and cement in the patient’s mouth.
4. Smile Design
Smile design uses both photographs and digital models to plan esthetic cases. The workflow often begins with 2D/3D documentation: detailed facial photographs and a digital smile capture (via intraoral scan) are combined. Steps include:
- Photo and face scan: Take standardized smile and face photos (and sometimes videos) to record lip dynamics and facial features. Some practices use 3D face scanners (e.g. Bellus3D, RayFace) to align the smile to facial contours. This “dynamic documentation” improves esthetic analysis.
- Digital Smile Design software: Programs like Digital Smile Design (Coachman), Exocad Smile Creator, or 3Shape Smile Design overlay the ideal tooth shapes onto the patient’s digital photo. Clinicians set midlines, gingival lines and tooth proportions in the software, often showing the patient a preview of the planned smile.
- Mock-up creation: The digital wax-up is sent to a lab or in-house printer. A 3D-printed model or a silicone guide is used to make a mock-up in the patient’s mouth (with composite or resin), allowing the patient to “test drive” the smile design before any irreversible work.
- Final restoration: Once the mock-up is approved, the definitive restorations (veneers, crowns, etc.) are designed in CAD (often using the same smile-design references) and manufactured (milled ceramics or printed crowns).
Common tools:
- DSLR cameras with calibration plates,
- 3D face scanners (RayFace, Bellus3D),
- smile design apps (DSD, Exocad, Smile Designer Pro),
- intraoral scanners, and
- 3D printers for mock-ups (Formlabs, Carbon).
Benefits: Smile design greatly enhances communication. From a facial perspective, it leads to better esthetic planning and patient understanding. The patient can visualize the end result (initial vs. proposed smile) on-screen or in a physical mock-up. Studies report that DSD provides better communication between specialists and an improvement in the expected outcome. Using digital mock-ups also ensures conservative preparations.
Challenges: Accurate photography and data alignment (photo-to-scan matching) require training and good equipment. Over-reliance on the “perfect digital smile” can set unrealistic expectations – clinicians should communicate the limitations. Integrating this workflow means extra steps (photo session, processing), so scheduling and software learning curve can be hurdles. Nonetheless, face-to-digital integration (and showing patients the plan) often justifies the effort.
Workflow summary:
- Capture: Take high-quality face/smile photos and intraoral scans.
- Plan: In smile-design software, superimpose ideal tooth shapes onto the patient’s digital photo for esthetic analysis.
- Mock-up: 3D-print a trial smile or use a silicone guide to create an in-mouth mock-up of the new teeth. Test fit and esthetics.
- Design final: Refine the design (accounting for any mock-up feedback) and design the final restorations in CAD.
- Fabricate: Mill or print the final crowns/veneers and deliver them, often achieving a smile very close to the original digital plan.
5. Full-Mouth Rehabilitation
A full-mouth rehab combines many of the above workflows into one complex case. It typically involves restoring both arches, often with changed vertical dimension, occlusion, and extensive cosmetic work. A modern full-mouth digital workflow might proceed as follows:
- Comprehensive data capture: Perform full-arch intraoral scans of maxilla and mandible, plus a face scan or facial photos to capture the patient’s smile and jaw relation. Jaw-tracking devices (e.g. ModJaw) or digital facebow solutions can record the occlusion. A broad CBCT may also be taken if implants or TMJ issues are involved.
- Digital wax-up & try-in: Using CAD software (like exocad), perform a complete digital wax-up of the planned rehabilitation. This design accounts for the new occlusal planes and esthetics. The wax-up is 3D-printed and a try-in denture or provisional set is fabricated. Adjustments are made based on fit and patient feedback.
- Phased treatment: Often the lower arch is treated first (setting the bite reference), then the upper. Teeth are prepared or built up (as needed) and scan bodies or posts are placed. After scanning the prepared arches, 3D-printed provisionals are made to wear for a healing period. These printed temporaries can be splinted for easy removal. According to one clinician, 3D-printed temps offer superior tissue response, making final cementation smoother.
- Final restorations: The final bridges/crowns (zirconia, lithium disilicate, composite) are milled or printed for each arch. Throughout the process, digital articulators and scanned bite records ensure that the vertical dimension and occlusal scheme remain consistent. Innovative CAD/CAM reduction templates and digital articulators have been described in full-mouth cases to precisely transfer jaw relationships and preparation depths from temporaries to the final prostheses.
Common tools:
- High-resolution scanners (full-arch IOS, CBCT),
- face-scanning solutions,
- CAD software with full-arch wax-up modules,
- large-format 3D printers (for multiple temporaries), and
- multi-axis milling machines for bridge frameworks.
- Digital articulation platforms (e.g. exocad Articulator, virtual condylar systems) help simulate jaw movements.
Benefits: A fully digital full-mouth plan allows the team to visualize the end result before cutting any teeth, reducing surprises. Using printed provisionals ensures that tissues adapt well; one report noted that printed temps “made the final cementation process straightforward as the tissues were so healthy”. The workflow also ensures that the planned occlusion and esthetic goals are consistently maintained. Importantly, digital templates and articulators can “control the reduction of depth” and accurately transfer the bite through all stages, improving predictability in complex reconstructions.
Challenges/Best Practices: These cases demand meticulous planning and large data sets. Ensuring accurate cross-arch scans and bite registrations is crucial. Collaboration (e.g. orthodontist or surgeon involvement) may be needed, and digital communication with labs is essential. As one study concludes, full-digital approaches can “streamline clinical and laboratory workflows, saving chairside time” while enabling minimally invasive preparations. However, such cases require significant technical expertise and often combination of multiple digital devices, so thorough training and support are key.
Workflow summary:
- Data acquisition: Full-arch intraoral scans + face scan/photos + bite record (CBCT if needed).
- Virtual design: Create a complete digital wax-up (lower arch first, then upper), plan occlusion and esthetics. Design 3D-printed trial dentures or temporaries.
- Provisional stage: Prepare teeth and place provisionals (often 3D-printed) that the patient wears for weeks. Verify fit/occlusion.
- Final stage: Scan prepared arches, design final full-mouth bridges/veneers. Mill/print final restorations, then deliver in balanced occlusion. Jaw relation is transferred digitally throughout using articulator tools.
Each of these workflows leverages digital tools to improve accuracy, efficiency, and patient communication. While adoption requires investment and training, the result is a more predictable, streamlined treatment process that benefits both clinicians and patients.
Sources
Academic and clinical literature on digital implant planning, orthodontics, CAD/CAM prosthetics, and smile design. Each workflow description is grounded in current best practices and published case reports.
References
- “A Digital Approach to a Full Mouth Rehabilitation.” Institute of Digital Dentistry, https://instituteofdigitaldentistry.com/cad-cam/a-digital-approach-to-a-full-mouth-rehabilitation.
- “A Digital Workflow for Full-Mouth Rehabilitation Using CAD/CAM Tooth Reduction Template.” American College of Prosthodontists, https://www.prosthodontics.org/a-digital-workflow-for-full-mouth-rehabilitation-using-cadcam-tooth-reduction-template-/.
- “A Step-by-Step Guide to Creating Surgical Guides with CBCT, IO Scanner, and 3D Printing.” Dental TI, https://www.dentalti.com/post/a-step-by-step-guide-to-creating-surgical-guides-with-cbct-io-scanner-and-3d-printing.
- “Digital Workflow for Clear Aligner Therapy.” Dental Economics, https://www.dentaleconomics.com/science-tech/article/14205255/digital-workflow-for-clear-aligner-therapy.
- “Fully Digital Workflow, Integrating Dental Scan, Smile Design and CAD-CAM: Case Report.” BMC Oral Health,https://bmcoralhealth.biomedcentral.com/articles/10.1186/s12903-018-0597-0.
- “Orthodontic Digital Workflow: Devices and Clinical Applications.” PubMed Central, https://pmc.ncbi.nlm.nih.gov/articles/PMC8690351/.
- “The Digital Workflow in Dentistry: Definition and Benefits.” 3Shape Blog, https://www.3shape.com/en-us/blog/digital-dentistry/digital-dentistry-workflows.
- “What Are Digital Impressions and How Do They Work?” 3Shape Blog, https://www.3shape.com/en-us/blog/digital-dentistry/digital-impressions.
- “Your Ideal Guided Implant Workflow.” Planmeca, https://www.planmeca.com/your-solutions/treatment-workflows/implantology/.


Comments