
Inventor and a dentist, Dr. Sigal Jacobson is an internationally acclaimed lecturer with more than 23 years of experience in esthetic dentistry. She is named one of this year’s Top 25 Women in Dentistry in the USA at the prestige DPR magazine. Dr Sigal published several articles in major dental magazines and invented the world renowned Uveneer™ system. She lectures globally on the subject of composite aesthetic restorations and minimally invasive dentistry that rely on adhesion for retention. She will be the first speaker at the historic DRDCA 2020 International.


Introduction
Composite restorations have become an integral part of any restorative dental practice and can be called “star of minimal invasion” due to its conservative concept. Recent developments in composite resin considerably improved the physical and esthetic properties, enabling practitioners to create esthetic restorations with excellent longevity and high patient’s satisfaction rate. 1

Many dentists consider direct composite placement in the anterior region to be a somewhat challenging procedure. Some of these challenges include: creating the final anatomical landmarks and contours, selecting the precise blending shade of composite and polishing it to perfection. In addition, many composite manufacturers propose the multi-layering protocol that requires placing an assortment of opacities and translucent shades to create a natural polychromatic effect. In clinical situations, the layering techniques are somewhat complicated, time consuming and hard to replicate when restoring multiple teeth. As a result, many dentists give up on the layering protocols and search for methods and materials that are simple and involve using one or two shades of composite only.
This article will outline some efficient methods to create natural looking direct veneers using a single composite shade and a unique composite template system, the Uveneer kit. At the end of the article readers will be able to implement a protocol for accurate composite shade selection for anterior direct restorations and create consistently blending results using a single shade of composite only.
What is Uveneer?
The Uveneer template system by Ultradent is an assortment of templates that simulate the facial shape and anatomical landmarks of anterior teeth.

The kit consists of 32 templates from both upper and lower arch, premolar to premolar in two sizes and based on the conventional smile design rules and proportions therefore will fit most patients. Each template is made of a thermoplastic material that is reusable and autoclavable.
The technique is simple: After applying composite on the facial surface of a prepped tooth and pressing the appropriate Uveneer template, one simple round of light curing (after which the template is removed), produces a hard, void-free restoration. Moreover, studies show that OIL (Oxygen Inhibition Layer) found on the outermost composite material , is softer and more susceptible to wear and stain.3 With light curing through the template the formation of the oxygen inhibition layer is prevented, and a glossy, durable restoration is formed which will retain gloss and color over time.
Case report
A young woman was embarrassed to show her teeth. Tooth No. 10 (21) was an implant crown restoration with poor match to the rest of the dentition (Figure 1).

The treatment option she was offered by another dentist to get satisfactory cosmetic results, was porcelain work on all anterior teeth . This approach proved to be beyond her budget, since her resources were diminished by her implant treatment. The treatment plan offered in this case with Uveneer was 3 composite veneers. This treatment was completed in 1.5 hr.
Treatment Steps –
Starting with the central incisors, the correct template is chosen (Figure 2). Note that its size and shape corresponds nicely to the tooth to be veneered. The teeth to be veneered required little preparation as they are retroclined.

After the insertion of retraction cord and sectional matrixes, the tooth was etched for 15 seconds (Figure 3). The tooth was sprayed with water for 5 seconds and gently dried. The adhesive system was then applied and cured for 20 seconds (VOCO America’s Futurabond U.)

A composite resin was then applied to the tooth’s labial surface without curing yet.
A small amount of flowable composite was applied into the template (VOCO America’s GrandioSO) and pressed onto the uncured composite that had been laid on the tooth (Figure 4). Excess was removed from the periphery using a probe.

Then light curing was done throughout the template while pressing for 30 seconds (Ultradent Products’ VALO LED curing light) (Figure 5). The template was then removed.

Retraction cord and separators were also removed. Residual excess was cleaned from the periphery with flame-finishing diamond burs (Figure 6)

The Uveneer template will generate the shine on the buccal surface (Figure 7)

This procedure was followed for the adjacent central and lateral incisor (Figure 8) for a complete smile make-over (Figure 9).


How to select the correct composite shade?
One of the main challenges of creating anterior restorations beside creating the anatomy is matching the right composite shade to the tooth. This step is crucial and has a significant impact on the success of the restoration. There are a few factors that affect the final restoration shade –
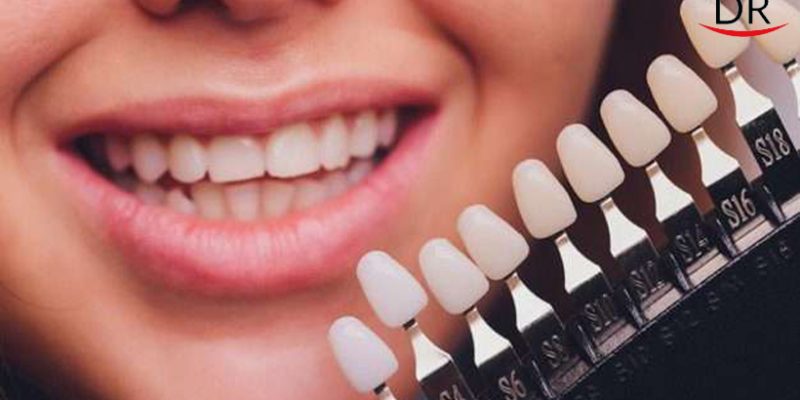
- Appearance analysis indicate substantial variation between same shades from different brands (Figure 10).
- Different thickness of the same composite presents different shade and masking ability.
- The underlying tooth reflects on the composite and affect the final shade.
- A gray appearance of the composite can be caused by the projection of darkness in the oral cavity. 4
- Light curing and polishing changes the final shade.

To overcome these challenges here are 5 essential steps to follow:
1: Keep it simple!
Spectrophotometry confirms that 90 percent of patients will present with an A hue. It is advised to reduce your composite inventory and avoid having unused shades in your armamentarium . The most common shades are A1, A2, A3, A3.5, A4, B1, bleach white and translucent shade.
2: Divide your composites into roughly three groups according to the Value (low, medium, high)
Value is the degree of lightness or darkness of the color material and is dictated by the transmission of light through, and reflectance from the material. Our vision is more sensitive to differences in value more then hue and chroma. Different brands of composite with the same shade may present with variance in shade value (Figure 10). as each brand applies different filler particles sizes and different matrix composition and opaques.
Low-value composites
Exhibit a light-diffusion property similar to natural tooth structure, with excellent tooth-blending properties. Low value composites are recommended to fix small enamel chips, Class V cavities, and cases when maximum blending with no changing or masking of the underlying tooth structure is required.
Applying low-value composites in thicker layers may appear grayer in appearance. e.g. Clearafil Majesty Esthetic by Kuraray, Gaenial Universal Flow- GC America.
Medium-value composites Used in many aesthetic cases. When applied in approx. 0.5mm thickness or more, they can mask, and at the same time incorporate, a “chameleon” and blending effect. Many of today’s Nano-composites are present as medium value in which the masking ability is controlled by the thickness applied. e.g Vitlescence by Ultradent, Admira by Voco.
High-value composites
When used in a thin layer, present with high opacity and masking ability, less to no tooth blending capabilities. Used in cases where changing the underlying tooth color is required, with minimal tooth preparation. e.g. Amaris by Voco, Gradia by GC
One brand can also incorporate all three groups in its range.
3: Be familiar with your composites shade capabilities.
It’s advisable not to change composite brands too often, as it takes time to get familiar with each one’s composite shade and value characteristics.
4: Prepare your individual shade guides
When selecting a composite shade to match a tooth, a common mistake is using a ceramic shade guide that’s fabricated from materials that differ entirely from the composites. Therefore, it is advised to create an individual, custom-made composite shade guide that will generate an accurate and realistic representation of the composites on hand. The composite shade guide should look as close as possible to the contours and gloss of the final result. You can prepare it as follows – (Figure 11-13)


5: Direct mock-ups
Having the end result in mind before starting any case plays a significant role in the success of any aesthetic work. In that respect, a simulated direct composite mock-up without bonding it to the tooth is highly recommended as it takes the guesswork out of shade selection. Direct mock-up allows the dentist to effectively view the final restoration regarding shape and final shade. It is also a great communication tool with the patient on the final aesthetic result.
Shade selection mock-up should be performed on the same tooth you plan to work on, under a natural humidity (as dehydration brightens the tooth). It is also recommended to aim to build the mock-up to the same thickness of the finished restoration. Once made into a realistic representation of the final result, remove it with the help of an instrument.
Creating polychromatic direct veneers with a single shade
It is a fact that teeth are polychromatic in appearance with a great variety of shades and nuances that are perceived and interpreted by the human eye. To mimic the natural gradient effect, dentists learn to apply multiple composite shades in different areas of the tooth.
In reality, enamel does not present with different shades and is somewhat translucent and colorless. It’s perceived as polychromatic because of the reflection of the dentin through different thickness of enamel in different areas of the tooth.
It is also knows that a single shade composite of various thicknesses will present with a significant difference in chroma, value and masking capabilities.7,8
Due to the precise anatomical contour and the convex shape of the template, by pressing on the composite with a Uveneer and curing it on the tooth results in different thicknesses of composite in various areas of the tooth (less toward the incisal third and gingival areas and greater in the middle of the facial surface), resulting in a natural gradient effect using a single shade of composite.
Another benefit of using a template is the embedded surface morphology reflections within the template have a significant influence on the final reflection of light. The “perceived” shape, length, and width of an anterior tooth is significantly influenced by the specular reflections coming from the surface morphology, heights of contour and line angles of the buccal surface.9
By pressing a tooth-shaped mould upon a composite resin, a 3D shape with an anatomical landmarks of a natural tooth is formed, this will affect how the light will reflect back and perceived by the eye. (Figure 14)

Creating an incisal translucency effect
In some cases, more pronounced incisal translucency is required. In such scenarios, it is recommended to apply any shade on to the tooth, then cut into the incisal uncured material into three lobes and add enamel layer onto the Uveneer template and combine it together and then cure (Figure 15-18).


Photos 15-18 courtesy of Dr. Mauricio Jegerlehner & Dr. Jorge Flore, Guatemala
Summary
Dentists need to be open-minded to new techniques while preserving the tooth structure, use common sense and rely on evidence-based dentistry. This recent product development, Uveneer by Ultradent, together with the advanced contemporary composites, make it now possible to create predictable natural results every time while using a single shade or two shades of composite only.
References
- BDA evidence summary, Bonded composites versus ceramic veneers.Case Reports in Dentistry, June 2014
- Ward DH. Proportional smile design using the recurring esthetic dental (red) proportion. Dent Clin North Am. 2001;45:143-154.
- Essam Salem Shawkat BDS,The effect of the oxygen inhibition layer on interfacial bond strengths and stain resistance of dental resin composites. The University of Birmingham, April 2009
- Rasha M. Abdelraouf , Nour A. Habib. Color-Matching and Blending-Effect of Universal Shade Bulk-Fill-Resin-Composite in Resin-Composite-Models and Natural Teeth. Biomed Res Int. 2016
- Emine Sirin Karaarslan,1 Mehmet Bulbul,2 Ertan Ertas,3 Mehmet Ata Cebe, Ero J Dent, 2016. Assessment of changes in color and color parameters of light-cured composite resin after alternative polymerization methods
- Lee YK1, Lim BS, Rhee SH, Yang HC, Powers JM. Color and translucency of A2 shade resin composites after curing, polishing and thermocycling.Esthetic Rehabilitation with Direct Composite Veneering: A Report of 2 Cases KyathamPubmed, 2005, Volume 2017 (2017)
- Noor Saira Wajid Najma Hajira, 2 Deepak Mehta, 3 P Ashwini, 4 N Meena, 5 HL Usha. Influence of Different Enamel Shades and Thickness on Chroma and Value of Dentin Vita Shade: An in vitro Comparative Assessment Study.
- Farideh Darabi a , Golpar Radafshar b , Maryam Tavangar a , Reza Davaloo a , Aref Khosravian c , Nastaran Mirfarhadi Translucency and Masking Ability of Various Composite Resins at Different Thicknesses, J Dent Shiraz Univ Med Sci., September 2014; 15(3): 117-122.
- James Fondriest, DDS, Inside Dentistry-The Optical Characteristics of Natural Teeth, November 2012, volume 8, Issue 11.
- Terry DA.Color matching with composite resin: a synchronized shade comparison. Pract Proced Aesthet , Dent. 2003
- Paravina RD, Kimura M, Powers JM. Color compatibility of resin composites of identical shade designation. Quintessence Int. 2006;37(9):713-9.
- Fahl N Jr. A polychromatic composite layering approach for solving a complex Class IV/direct veneer/diastema combination: Part II. Pract Proced Aesthet Dent. 2007;19(1):17-22.
- Franco EB, Francischone CE, Medina-Valdivia JR, Baseggio W. Reproducing the natural aspects of dental tissues with resin composites in proximoincisal restorations. Quintessence Int. 2007;38(6):505-10.
- Terry DA. Restoring the incisal edge. N Y State Dent J. 2005;71(5):30- 5.
- Robert Lowe DDS, Composite restorations: Subtleties in shade and techniques, peer review publication, October 2010
- Vanini L. Conservative composite restorations that mimic nature: a step-by-step anatomical stratification technique. J Cosmetic Dent. 2010;26(3):80-9812. Fahl N Jr. A polychromatic composite layering approach for solving a complex Class IV/direct veneer/diastema combination: Part II. Pract Proced Aesthet Dent. 2007;19(1):17-22.


Comments