23 years into practice and I can still recall the days when as a fresher into endodontic practice, I used to wish that it’s better if i get anterior or mandibular molar root canal patients! Managing maxillary molars was something I used to find difficult. Sharing my experience and gradual learnings to make your journey a bit easier!


Tip 1 – Diagnosis
The most important aspect of performing an endodontic procedure is to first correctly diagnose the tooth. There are several tools to help you understand just what’s going on with the patient’s tooth: radiographs, percussion tests, pulp testers, and endo sprays. Take your time as only the right diagnosis will take you to success. My first and foremost advise will be – listen to your patient carefully.

There is no doubt that radiography is one of the cornerstones of endodontics. We use radiographs to aid diagnosis, during endodontic treatment, to judge the quality of the root treatment we have just completed, and to monitor healing. In the last decade, there has been a shift from wet film radiographs to digital. Believe me RVG is worth your investment. It not only saves your time but clarity of images improves the quality of treatment.
After listening to patient’s chief complaint , you can always ask some leading questions or look for the sign and symptoms to decide if the tooth needs pulp capping or root canal treatment.
How will you decide if the patient requires coot canal treatment? Here are 9 clues that may help!
- Tooth pain that doesn’t go away: Many dental problems can cause tooth pain. If the patient has pain deep in the tooth, he may need root canal therapy. Discomfort may also radiate to his jaw, face or other teeth. So if a patient says that he has pain which is radiating, this is your first clue that tooth might need RCT.
- Sensitivity to heat and cold: If his tooth hurts when he drinks hot coffee or eats ice cream, it could mean that he needs root canal treatment. This is especially true if the pain lingers for more than a few seconds. In my experience, sensitive to hot is our second clue specially which lingers for some time.
- Swollen gums: When a tooth is infected, pus can collect in the area. This can lead to puffy, swollen or tender gums. Sometimes swelling could be related to gingiva, so we need to differentiate.
- Pimple on the gums: Patient may develop a pimple or boil on the gums. Pus from the infected tooth may drain from this pimple, causing an unpleasant taste or smell.
- Swollen jaw: Sometimes pus doesn’t drain from the site. As a result, jaw may become visibly swollen.
- Tooth discoloration: When the pulp of a tooth is non vital, it can cause the tooth to look darker. This occurs because of poor blood supply to the tooth. Usually, trauma is the root cause for discoloration.
- Pain when pressure is applied: If patient has pain when he eats or touches the tooth, it could mean the nerves around the pulp are damaged and in need of a root canal treatment. This is the popular POP (pain on percussion) or TOP (tender on percussion) test that we all have performed during internship!
- A severely chipped or cracked tooth: If patient has severely cracked a tooth in an accident, when playing sports or even by biting down on something hard, bacteria can reach all the way into the tooth pulp. It is better to verify the location and severity of the crack with an x-ray before starting the RCT.
- Loose tooth: An infected tooth may feel looser. This is because the pus from the infected pulp can soften the bone that supports the tooth. Since this may also be a finding in severe periodontitis cases, verify with an X-ray if the mobility is of endodontic origin, periodontal origin, or the lesion is an endo-perio lesion.
Self medication is very common in India. So, if a patient has already taken analgesic for tooth pain specially during night time…it’s indicative of pulpal pain. Tooth might require root canal treatment.
What if you are still unsure if the tooth requires RCT?
In few cases it’s difficult to be sure. In such cases, you can go ahead with pulp capping.
Pulp capping can be divided in to two categories: indirect pulp capping or direct pulp capping.
- For an indirect pulp cap (IPC), a carious lesion approaches the pulp tissue, but a pulp exposure does not occur.
- With a direct pulp cap (DPC), the pulpal tissue is slightly exposed and a medicament is placed over the pulp.
You can give temporary restoration and wait for few days and observe before making final decision regarding pulp capping or RCT.
Direct pulp capping procedures offer an alternative to root canal treatment in select patients. Dycal and Mineral Trioxide Aggregate (MTA) have been studied extensively as direct pulp capping agents. Current research indicates better results when MTA is used as the pulp capping agent.
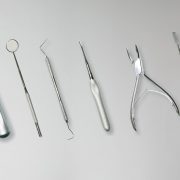
Tip 2 – Select the right needle for LA
It is necessary to use a topical anaesthetic before injection. These are available in gel, liquid, ointment or pressurized forms. The most common ones are those containing benzocaine or lidocaine. Gels are used for effective pain relief and to alleviate pain at the point of injection of the local anaesthetic.
After gel application, 30 gauge needle /insulin syringe can be used to reduce the pain of inferior alveolar nerve block. Be gentle, if patients feel that you are taking extra care to make injection painless, you win their faith.
Tip 3 – Locate the pulp chamber correctly
Any permanent tooth not worn down occlusally/incisally has a pulp chamber that is situated approximately 7 mm from a cusp tip or an incisal edge. Slowly gain depth by small degrees leading up to access.

Figure 1. The length of the bur head plus the tapered portion of the shank equals to 6.50 mm in length, which closely corresponds to a depth slightly deeper than the roof of the pulp chamber when measured from an unworn cusp tip.

Figure 2. This 6.50 mm mark on the shank of a high speed round bur can be easily marked with a colored ink, allowing the dentist to ease it up with the cusp

Use the Endo Access bur at a predetermined length (marked with a SharpieⓇ permanent marker) so as not to perforate the furcation. The design of the bur is a combination of a round and cone-shaped course diamond which allows access into the pulp chamber and preparation of the chamber walls, in one operation.

Bur with a non-cutting tip is used to taper and smoothen the access cavity preparation. Endo-Z Bur Safe End bur, with its long, tapered shape, allows widening of the pulp chamber for adequate access. The rounded, non-cutting safe-end tip prevents penetration of the pulp chamber floor or the root canal walls.
Always divide your RCT into three parts:
- First widen the access
- Then, prepare the glide path which ensures that file easily reaches the desired working length and lastly
- Finally, prepare the apical third .
4. Tip 4 – Access is Success!
A well-known endodontist, Dr. Frank Weine, coined the adage “Access is success.” What this means is that if you get the access cavity design right, it makes the preparation of the root canals much easier. The access cavity should be large enough so that direct line access to the canals can be achieved, but small enough so that as much of the coronal tooth tissue as possible can be preserved.
Once access is gained, the entire roof of the pulp chamber should be removed. At this step (deroofing), you can change but from Endo access to Endo Z safe end bur. This really helps as we don’t disturb the floor of pulp chamber and only roof is removed. We should be able to see canals on floor as road map.
Finding canals is a bit easy in mandibular molars. Sharing few tips to negotiate maxillary molar canals:
LOCATING THE PALATAL CANAL
Locating the palatal canal is a starting point for locating the other buccal canals as it is the biggest. It is often located at or slightly mesial to the midpoint of the palatal surface of the molar. The palatal canal is often angled at approximately a 45-60° angle relative to the molar crown long axis. We can point a 330 bur toward the mesial, at approximately a 45-60° angle. After penetrating the pulp chamber roof, irrigate the initial access opening, and attempt to locate the palatal canal with a #10 file. If the palatal canal cannot be located, we can widen the access opening in the area where we presume that the palatal canal orifice is located, try again to locate the orifice, and repeat these steps until the orifice is located. A dentist can distinguish the palatal canal visually from the other canals since the palatal canal deflects the file handle in a buccal direction.
LOCATING THE MESIOBUCCAL (MB) AND DISTOBUCCAL(DB) CANALS
The orifice of distobuccal(DB) canal is is at a distance of 3 to 4 mm distance from the palatal canal orifice in the distopalatal direction most cases. The mesiobuccal (MB) canal orifice is generally located at 2 mm distance from the DB canal in the majority of cases. After locating either the mesiobuccal 1 (MB1) or the distobuccal (DB) canal, we can use a #8 file to remove canal tissue that may be hemorrhaging blood, to make it easier to locate other canals. Even if there is a tiny distance between the DB, MB1 and MB2 canal orifies, the canals can be visually distinguished from one another. A file that is not in the palatal canal, and that emerges from the canal with the file handle directed toward the mesial, is in the DB canal.
LOCATING THE SECOND MESIOBUCCAL (MB2) CANAL
Since the MB2 canal is present in most (70-90%) of maxillary first molars, and approximately, 45% of maxillary second molars, its presence should be assumed until demonstrated otherwise.The MB2 canal may be located a fraction of a mm from the MB1 canal, and may eventually join with the MB1 canal, The MB2 canal may also be located approximately midway between the MB1 canal and the palatal canals. If an MB2 canal is extremely narrow in diameter or partly calcified, the canal may initially only be accessible using a #6 file lubricated with ethylenediaminetetraacetic acid (EDTA) chelating agent .

Another advise— no file should go inside the canal without lubrication. EDTA gel/liquid are available for lubrication. I prefer EDTA liquid .
Tip 5 – Use an Ultrasonic!
So next tip is to use your ultrasonic scaler to it’s full potential! It can make your life easier! Think of your ultrasonic as a safer slow handpiece with much better vision.
- You can use it to remove dentin when you’re searching for canals and it’s much better than the slow handpiece because you remove dentin in smaller increments with much more control and you can see better since the tip is very thin, whereas a slow speed handpiece blocks your view completely!
- It’s also the best way to remove pulp stones and pulp tissue when used in combination with sodium hypochlorite.
- And lastly, you can use it initially to open up your canal orifice!
Though endodontic scalers are available, but incase as a beginner you don’t want to invest then you can try this …use jugaad and try out this with regular periodontal scaler. However, one benefit of endodontic scalers is little to no handpiece vibration, helping eliminate hand fatigue and increase tactile sensitivity.
Tip 6 – Use different types of files – and angulations – for WL radiographs!
This tip will help you when taking your working length radiographs. Especially with molars there are multiple canals and when you take your working length radiograph you could have three or four files in there and sometimes it can be tough to know which file is in which canal. An easy way to differentiate, is by putting a different file type in each canal. So for example, for a lower molar, it can be difficult to distinguish between the mesiobucal and mesiolingual canals, so put a k-file in one and a hedstrom (H) file in the other. It doesn’t matter what you put in the distal canal because it will be obvious. Then take your x-ray and on the x-ray you will see the different flute shape on the files and you’ll know which is which.
Same Lingual Opposite Buccal or the SLOB rule:
The SLOB rule is used to identify the buccal or lingual location of objects (impacted teeth, root canals, etc.) in relation to a reference object (usually a tooth). If the image of an object moves mesially when the tubehead is moved mesially (same direction), the object is located on the lingual. If the image of the object moves distally when the tubehead moves mesially (opposite direction), the object is located on the buccal.• Keeping all these in mind while interpreting X Rays is really important.
Tip 7 – Irrigation is an art.
- If the tissue in the canal is vital, the irrigant that should be introduced is 17% EDTA, a mild acid that chelates the calcium in the dentin making it somewhat softer and, consequently, easier to negotiate.
- Do not use sodium hypochlorite (NaOCI) initially in vital cases because it tends to coagulate the remnant pulp tissue, making it harder to negotiate through and beyond. If the tissue is nonvital, by all means use 5% NaOCI immediately after gaining entry. Nonvital tissue is rapidly digested in the presence of 5% NaOCI.
- Another valuable tip is that irrigate really slow and use short vibrating motion in and out while irrigating.
- Dont try to inject NaOCI in canal in one shot……it can be dangerous.
- NaOCI has really bad taste,so avoid spilling it in the mouth. You can use high vacuum suction. If you don’t have high vacuum suction, then you can cut the top end of the regular suction tips and make it into a high vacuum suction – another jugaad I learnt in a CDE programme!
Tip 8 – Select the right needle for irrigation
Side vent endodontics irrigation needles – size 30G, length 25mm, rounded tip, closed front end is the needle of choice for irrigation in endodontics. It has one lateral vent for gentle but effective irrigation for root canals. Advantages include:
- It prevents extrusion of irrigation solution into periapical tissue.
- It eliminates the hydraulic pressure and ensures safe delivery of solution.
- Penetration of the apex is avoided due to the lateral vent and rounded end, therefore the full length of the root canal maybe safely irrigated.
- This thin-walled needle improves flow rate, offers better irrigation and high flexibility.
Tip 9 – Use root canal sealers – and the right ones.
During the obturation appointment, I dry the canals by inserting paper points cut to the root canal working length. Fit a standardized gutta-percha point to the established root canal working length, which is 1 mm short of the root canal length. Check the fit of the gutta-percha point in a radiograph. And then I come to the most important part – sealing.
The basics in dental college I learned was that gutta percha doesn’t seal- sealer seals. Root canal sealer is necessary to close the space around your gutta percha all the way to the dentinal wall. Another function of root canal sealer is to fill in any gaps and voids, and to flow into and seal off lateral and accessory canals. Clearly, choosing a good sealer that works in your hand is imperative to your treatments’ success. commonly used sealers were classified into following three groups:
- Group 1: Zinc oxide eugenol based sealers, for example, Pulp Canal Sealer, Tubli-Seal, Roth’s Sealer,Sealer EWT.
- Group 2: Calcium hydroxide based sealers, for example, Apexit, Vitapex.
- Group 3: Resin-based sealers, for example, AH26, AH Plus, Diaket.
Understanding their indications will help you in choosing wisely.
Right now, the root canal sealer that I use is AH Plus-an epoxy resin sealer. I’ve been using AH Plus/Ribbon for twelve years, and I’ve been very happy with it. I love the way it flows-I’m always sure that it goes into those little voids around my obturation material, and I’ve seen it flow into lateral canals over and over again. It has great adhesion and is radiopaque, which makes my fills look dense and makes it easy to remove if I ever have to retreat my own case. One drawback is that it does shrink upon setting, but overall, I’ve had a great experience using it.
Another one I like is Gutta flow from Coltene.· It is first non-heated flow-gutta percha that does not shrink. It allows great ease of handling as only one master point is needed But, just because I use it doesn’t mean you need to run out and make any changes. You might even want to use different sealers in different situations. So, let’s talk about the rest of the best root canal sealers out there—
Dentists have used zinc oxide-eugenol root canal sealers for years, with a lot of success. The major benefit of a zinc oxide sealer is that it will resorb if it has overextended into the periapical tissues. Hence, it a great choice if the apex of the tooth is close to a vital structure such as the inferior alveolar nerve. It also exhibits antimicrobial activity; however, it can lead to staining in some tooth structures.
Bioceramics entered the scene during the 1990s, but their newest generation gives them some good flow. These sealers have become popular because they’ve revived the use of a single cone obturation. Instead of getting a shrinkage of the sealer, you’ll see a slight expansion-around 0.2%. This method means that your gutta percha’s purpose changes-it’s meant to force your sealer into the small crevices, as well as keeping a soft core in the middle in case of a retreatment. In the past, we wanted to have more gutta percha and less sealer in our obturations, but bioceramic sealers necessitate less gutta percha and more sealer.
Once set, they won’t show much resorption, so be careful not to over- extrude your sealer.
Tip 10 – Take your time.
Quality root fillings can’t be rushed. With repetition, speed will follow while maintaining the quality. Always work with a rubber dam to give you a dry working field and prevent your canals from getting contaminated.
However, two things can reduce your treatment time effectively:
- Modern apex locators save time and reduce extra radiation exposure.
- Magnification makes things clearer and improves your quality further
Bonus tip no. 11!
Patience and consistent quality efforts are the golden keys to successful endodontic work. You may make mistakes but keep learning from them. Associating with mentors always gives you the required confidence. Go attend webinars, CDE programme by IDA or some workshops to enhance your skills. DentalReach organises some wonderful learning sessions like DR Clinical Series or their conferences DRDDS/ DRDCA…do attend and get benefitted. Wishing you all a great endodontic journey!


Comments